
This week, we are learning all about dinosaurs. These activities are both fun and educational while also developing necessary motor skills needed in the future. Each activity comes with a parent guide and instruction manual so you can create your own dino-tastic curriculum with ease!
Salt Dough Fossils: 7-minute prep; 10-minute play
Sensory Bag Fossil Hunt: 5-minute prep; 15-minute play
Preschool Dinosaur Math Worksheets: 5-minute play
Carnivore vs. Herbivore: 5-minute prep, 10-minute play
STEM Dinosaur Eggs: 10-minute prep, 20-minute play
Scissor Skills Dinosaur Rescue: 3-minute prep, 10-minute play
Sensory Bag Fossil Hunt


Materials:
- Gallon size or larger ziploc bag
- Brown food dye (or color of your choice)
- Water
- Tape
- Printer
- Fossil Hunt Printable
First add about 3/4 a cup of water, you can do more or less depending on how big your bag is. The goal is for the bag to lay flat on the paper and cover it completely.
Next add in about 10 drops of brown food coloring to your water and give it a mix. We are going to hide the paper underneath so if you need to add more don’t hesitate.
After that you want to push out as much air as possible, and seal shut. Lay the bag on a flat surface horizontally, the seal should be facing left or right. Now place a large piece of tape over the seal to secure it to the surface. Next place tape on the top and bottom of the bag, leaving one side open.
Now download Free Fossil Template, and print. Place paper underneath the open side of the plastic bag.
Parent Guide:
Introduce the activity by
“The dinosaur fossils are hiding; can you help me find them?”
“We are going to hunt for dinosaur fossils today!”
The activity should be eye level with your child and easy to reach. Use one finger to move the water around to demonstrate to your child how to play. Let your child do this until they have discovered a hidden dinosaur fossils.
After they discover a fossil, prompt your child into researching by asking:
“Wow, that is so cool, I wonder what this dinosaur name is? Let’s check!”
“Hmm, what’s that dinosaur called? let’s look at the key to find out!”
Use the key and find out the name of the dinosaur they have discovered.
Ask questions like
“Do think this dinosaur was big and slow or big and fast?”
“What type of food do you think this dinosaur ate?”
“Why do you think that?”
“How do you think this dinosaur sounded when it roared?”
Salt Dough Fossils

Materials:
- 1 cup of flour
- 1/2 cup of salt
- 1/2 cup of water
- Glass cup
- Mixing bowl
- Dinosaur Toys
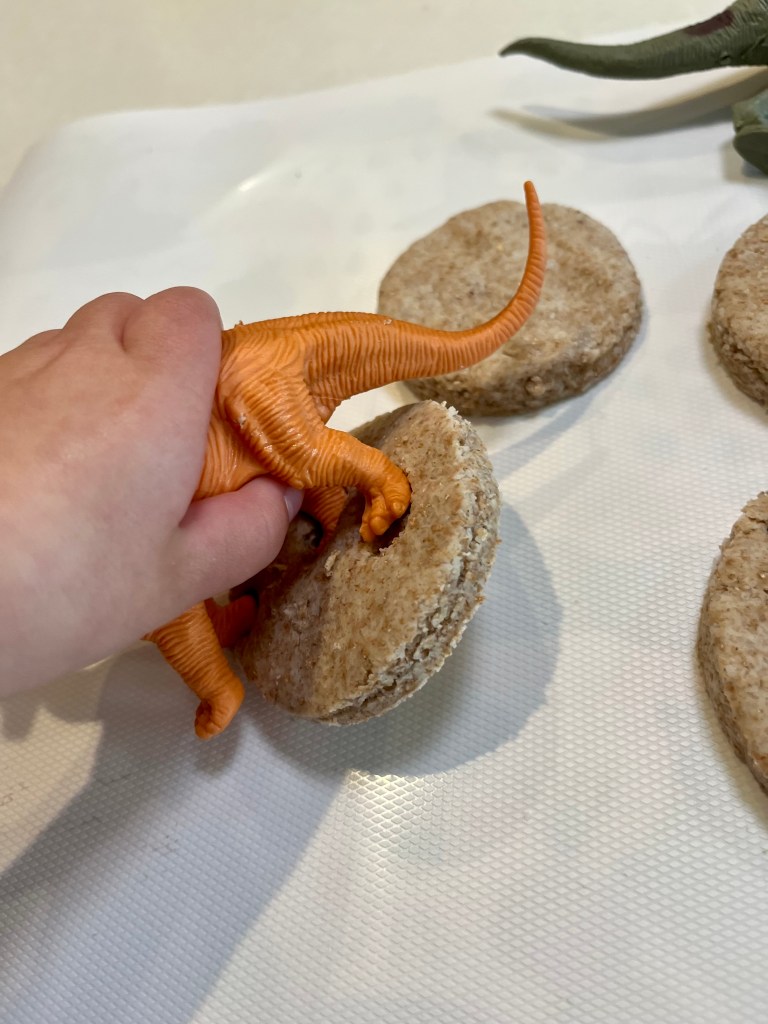
Mix all ingredients together in the bowl until combined. Next form into a ball and push out with your hands into about a half inch thickness. Use your glass cup to cut out as many circles as you can. This recipe can yield anywhere between 4-8 circles depending on your cup, I was able to make 6.
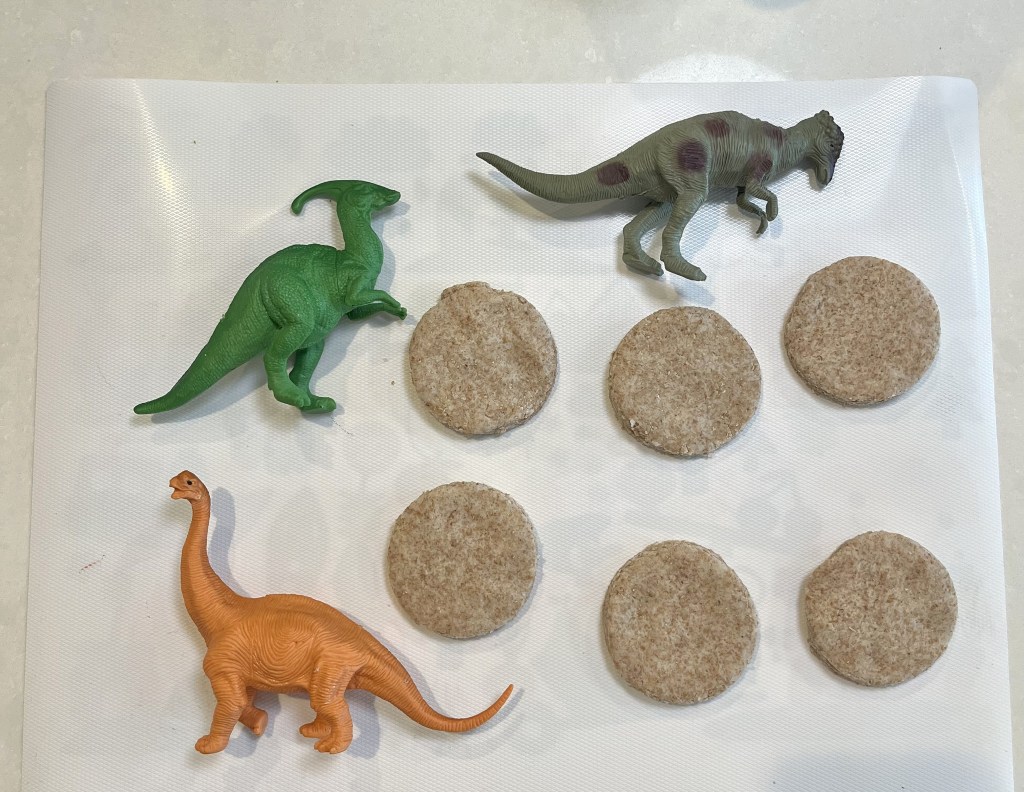
Now that you have your circles, have your child walk the dinosaurs on top of the dough to leave footprints.
Parent Guide:
Start the activity by having your child pick which dinosaur they would like to make a fossil with. Help them add pressure if needed.
As you are creating the fossils you can explain what a fossil is with child friendly language like:
“Fossils are bones, shells, or footprints that are found in rock or sap from trees”
“Dinosaur fossils are really old, and can be big and small”
You can use a child encyclopedia to learn more information about fossils together.
Scissor Skills Dinosaur Rescue

Materials:
- Masking Tape
- Bucket
- Dinosaur Toys
- Kid Scissors
Place the dinosaur toys in the bucket and grab your tape. For children 3 and under place 5 to 8 strips over the bucket with 2 pieces crossing over. Children 6 and under place a minimum of 10 tape strips over the bucket with multiple intersecting pieces.
Parent Guide
If you have not begun scissor safety training and beginner scissor skills exercises, you may want to consider saving the exercise until you are confident in your child’s abilities.
If your child can hold a pair of scissors properly and cut a line on paper without help, then this is great activity for them to build up to cutting more complex shapes.
Start with
” Oh, no! The dinosaurs need our help to rescue them.”
“Can you help rescue the dinosaurs with me?”
Go over scissor safety before handing the scissors to your child.
“We can use the scissors to cut the tape.”
“Let’s free the dinos by cutting the tape!”
Use your discernment, if your child is wobbly and unable to balance their hand to cut the tape, you can always take the lead either with encouragement or placing your hands on top of theirs.
STEM Dinosaur Eggs
Materials:
- Small Dinosaur Toys
- Plastic Spray Bottle
- Tray
- Mixing Bowl
- Food Dye of choice
- Water
- White Vinegar
- Baking Soda
Place 8 tablespoons of water and your choice of food dye in a bowl. If choosing multiple colors use 2 tablespoons of water for every color. Next add 2 cups of baking soda into the large mixing (1/2 cup of baking soda per color). Mix until well combined and crumbly.
Hide a small dinosaur toy in a clump and roll into a ball or egg shape to completely cover.
For child aged 5 and up place the eggs in the freezer for 10 minutes to make the activity last longer by making the eggs extra tough.
Place eggs on tray and pour the vinegar in the spray bottle. Have your child hatch the dinosaurs by spraying the bottle on the eggs. This will help strengthen the muscles needed for writing!
Parent Guide:
As the eggs start to fizzes as the baking soda reacts to the vinegar, you can explain the chemical reaction that occurring.
You can start by stating what your observations are:
“Wow, I see a lot of fizzy bubbles.”
You can ask your child if they know or can guess what is happening.
After they answer you can give them the explanation
“This is a chemical reaction. When baking soda and vinegar mix together they create a
Carnivore vs Herbivore
Materials:
- Printable
- Pompoms (green and orange)
- Small bowls (green and orange)
- Glue
- Scissors
First go over the characteristics and definitions of both a carnivore and herbivore.
Carnivore
Definition: A carnivore is an animal that eats meat.
Predator, Sharp teeth. Possibly claws
Herbivore
Definition: A herbivore is an animal that eats plants.
Prey, Flat Teeth
Next ask questions:
“Why do you think a carnivore has sharp teeth?’
Explain that sharp teeth help get through tough or scaly skin to eat meat. Refer to a meal your child has eaten like steak or porkchops as an example on how teeth are used to tear meat.
Do the same thing when discussing herbivores
You can choose to use a child’s encyclopedia to learn more or move on the next actvity.
Midline Activity
Place the green and orange bowls in front of the child. I am using orange instead of red as it is a less intense color for meat, and green to represent plants. For this to be an effective midline activity, you will need to place the pompoms in front of the opposing color.
Help your child understand the activity by explaining that the green bowl is a herbivore and the green pompoms are plants, the orange bowl is a carnivore, and the orange pompoms are meat. We will need to feed both the carnivore and the herbivore, by placing the pompoms in the right colored bowl.

Skills Practiced:
Bilateral Coordination
Crossing Midline
Color Matching
Crossing Midline
Crossing the midline is the ability to cross the imaginary line that divides the left and right sides of the body.
Make sure your child is using the same hand for the same color!
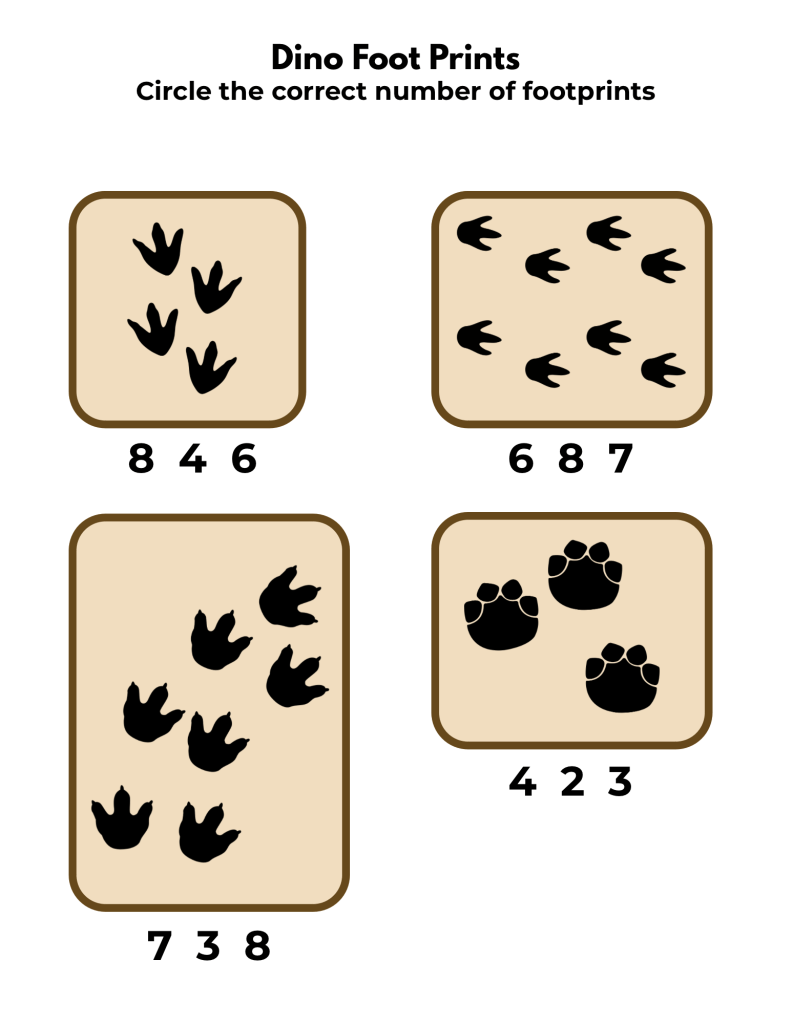
Preschool Dinosaur Math Worksheets


Leave a comment